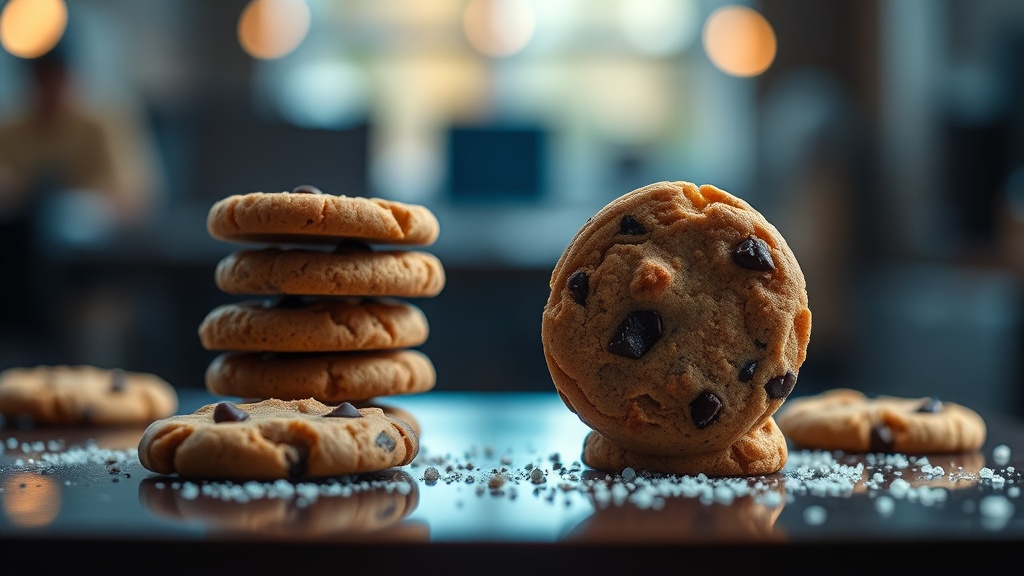
Why Your Cookies Are Spreading Too Much

Imagine pulling a tray of chocolate chip cookies out of the oven, expecting thick, chewy mounds, only to find a single, thin, greasy puddle of dough covering the entire baking sheet. This is one of the most common frustrations in home baking, but it is rarely a mystery. Cookie spread is a physical reaction driven by temperature, ingredient ratios, and fat stability. Understanding these variables will help you move from inconsistent results to a predictable, professional-looking bake every time you use your oven.
The Role of Temperature in Cookie Spread
Temperature is perhaps the most significant factor in how much a cookie expands during the first ten minutes of baking. If your ingredients are too warm before they even hit the oven, the structure of the dough will fail before the flour has a chance to set.
Butter Temperature
The state of your butter dictates the initial structure of the dough. If a recipe calls for "softened" butter, it should feel pliable like room temperature, but it should not be greasy or melting. If you use melted butter in a recipe that calls for creamed butter, the fat will be in a liquid state immediately upon entering the oven. This causes the dough to lose its structural integrity almost instantly, leading to a flat, thin cookie. For a thicker cookie, ensure your butter is roughly 65°F (18°C). If you find your cookies are consistently too thin, try using slightly cooler butter than the recipe suggests.
Chilling the Dough
Chilling is not just an optional step for flavor development; it is a structural necessity. When you chill cookie dough in the refrigerator, you are solidifying the fats and hydrating the flour. A cold fat takes longer to melt in the oven, which gives the edges of the cookie time to set and firm up before the center collapses. If you are making a high-fat dough, such as a classic Toll House style, refrigerating the scooped dough balls for at least 2 hours—or even 24 hours—will significantly reduce the spread. This process also allows the starch in the flour to fully absorb the moisture, resulting in a more cohesive dough.
Oven Temperature Calibration
If your oven is too cool, the cookies will sit and spread for a long time before the heat is high enough to bake the edges. Conversely, if the oven is too hot, the outside might burn before the inside is cooked. However, the most common issue is an improperly calibrated oven. If your oven thermometer shows that your temperature is actually lower than what you set the dial to, your cookies will spread excessively. Use an inexpensive oven thermometer to verify that your oven is reaching the target temperature before you slide your tray in.
Ingredient Ratios and Chemistry
The way your ingredients interact determines the strength of the "walls" of your cookie. If the ratio of liquid to dry ingredients is off, no amount of chilling will save the bake.
The Impact of Sugar Types
Sugar is a liquefier. When sugar dissolves in the moisture of the dough, it turns into a liquid. White granulated sugar tends to encourage more spread because it dissolves easily and promotes crispness. Brown sugar, which contains molasses, is hygroscopic, meaning it holds onto moisture. This moisture helps create a chewier, thicker texture. If you want a cookie with less spread, increase the ratio of brown sugar to white sugar. For example, if a recipe calls for equal parts, try using a 2:1 ratio of brown to white sugar to achieve a denser, more substantial cookie.
Flour Strength and Protein Content
The protein in your flour provides the gluten structure that holds the cookie together. If you use a low-protein flour, such as cake flour, your cookies will likely be thin and delicate because there isn't enough structural support to hold the weight of the fat. For a sturdier cookie, use an all-purpose flour with a protein content between 10% and 12%. If you find your cookies are consistently too thin, you might consider adding a tablespoon or two of extra flour to the dough to increase the structural density.
Leavening Agents
Baking soda and baking powder serve different purposes. Baking soda (sodium bicarbonate) is alkaline and tends to encourage browning and spreading. It reacts with acidic ingredients like brown sugar or molasses to create lift, but it also weakens the structure slightly. Baking powder provides a more controlled, vertical lift. If your cookies are spreading too much and look very flat, you may be using too much baking soda. Ensure you are measuring your leavening agents with a level measuring spoon rather than a rounded one to avoid an over-leavened, flat result.
Equipment and Technique Nuances
Sometimes the issue isn't the dough itself, but the environment in which you are baking. Your tools and your physical movements can change the outcome of your bake.
Baking Sheet Material
The material of your baking sheet affects heat conductivity. Dark-colored or heavy-duty aluminum pans absorb heat more rapidly and distribute it more intensely. If you use a dark baking sheet, the bottom of the cookie will heat up very quickly, causing the fat to melt and the cookie to spread before the top has even begun to bake. If you are a beginner, stick to light-colored, heavy-gauge aluminum pans, which provide more even and predictable heat distribution. If you must use a dark pan, consider using parchment paper or a silicone mat to create a thermal barrier.
The Importance of Parchment vs. Silicone
Parchment paper is a neutral surface, while silicone baking mats (like Silpat) are designed to be highly non-stick and can sometimes hold heat differently. While silicone mats are excellent for preventing sticking, they can sometimes lead to more spread because they do not allow the dough to "grip" the surface as much as parchment does. If you are struggling with spread, try switching to high-quality parchment paper to see if the results stabilize.
Overmixing the Dough
While overmixing is usually discussed in the context of cake or bread, it matters in cookies too. When you cream butter and sugar, you are incorporating air. If you overwork the dough after adding the flour, you may develop too much gluten, which can lead to a tough, but strangely flat, cookie. However, the more common issue is under-mixing the sugar and fat, which prevents the ingredients from emulsifying properly. A poor emulsion leads to a broken dough that cannot hold its shape in the heat.
Troubleshooting Checklist
If you have followed a recipe and still encountered excessive spread, run through this checklist to identify the culprit:
- Was the butter too soft? If the butter was shiny or oily during the creaming stage, it was too warm.
- Did you use the right flour? Check your packaging to ensure you didn't accidentally use cake flour or a low-protein flour.
- Was the dough chilled? If you baked the dough immediately after mixing, the fat was likely too unstable.
- Is your oven actually at the right temperature? Use an oven thermometer to check for a "cold oven" effect.
- Did you use too much baking soda? Try reducing the leavening agent slightly in your next batch.
Baking is a science of ratios and temperatures. By adjusting these small variables—the temperature of your butter, the type of sugar you use, or the amount of time you chill your dough—you can take full control of your cookie texture. Don't be discouraged by a tray of flat cookies; treat every "fail" as a data point for your next successful bake.