Transform Your Leftover Coffee into Rich Chocolate Glaze

Imagine staring at a cold, half-finished cup of coffee sitting on your counter, feeling like it's destined for the sink. Instead of pouring it down the drain, you can turn that liquid into a glossy, decadent chocolate glaze that makes a simple loaf of cake look like it came from a high-end bakery. This post shows you how to use leftover coffee to add depth and a subtle mocha undertone to your chocolate glazes without needing to buy expensive espresso powder.
Coffee acts as a flavor booster in baking. It doesn't make the final product taste like a cup of joe; rather, it deepens the profile of the chocolate. It’s a trick I learned when I was trying to reduce food waste in my own kitchen—sometimes the "leftovers" are actually the best part of the recipe.
Can You Use Cold Coffee in Chocolate Glaze?
Yes, you can use cold coffee, but it's much easier to work with if you gently warm it first to help the chocolate melt smoothly. If you're using a recipe that calls for hot liquids, a lukewarm coffee works perfectly fine. The key is the ratio of liquid to chocolate to ensure you don't end up with a runny mess.
When you're working with chocolate, temperature matters. If the coffee is too hot, you might seize the chocolate (that's when it turns grainy and clumpy—not a good look). If it's too cold, the fat in the chocolate won't emulsify properly. Aim for a temperature that is warm to the touch, similar to a standard cup of tea.
For the best results, I recommend using a high-quality dark chocolate like Guittard or Lindt. These brands have a high cocoa butter content, which helps create that professional, shiny finish we all want. You can check the composition of different types of chocolate on Wikipedia to see how cocoa solids and fats affect melting points.
The Essential Ingredients
You don't need a long grocery list for this. Most of these items are likely already in your pantry. If you want to get fancy, you can add a pinch of salt to sharpen the flavors, but it isn't required.
- Dark Chocolate: Use chopped bars rather than chips if you want a smoother melt.
- Leftover Coffee: Any roast works, but a medium or dark roast provides a better flavor profile.
- Unsalted Butter: This adds the shine and a velvety mouthfeel.
- Vanilla Extract: A splash of real vanilla helps round out the bitterness of the coffee.
If you want to experiment with flavors, remember that coffee pairs beautifully with spices. If you've been practicing keeping your spices fresh and flavorful, you might have some cinnamon or cardamom on hand to add a tiny hint of warmth to the glaze.
How Do I Make a Coffee Chocolate Glaze?
To make this glaze, you'll melt chocolate and butter together while slowly whisking in warm coffee until the mixture is glossy and thick. It takes about ten minutes of active work and produces a professional-looking finish.
Here is the step-by-step process for a standard batch:
- Chop the Chocolate: Take about 200g of dark chocolate and chop it into small, even pieces. Smaller pieces melt faster and more evenly.
- Warm the Coffee: Pour 60ml of your leftover coffee into a small saucepan. Heat it until it is steaming but not boiling.
- Combine: Place the chopped chocolate and 30g of butter in a heat-proof bowl. Pour the warm coffee over the mixture.
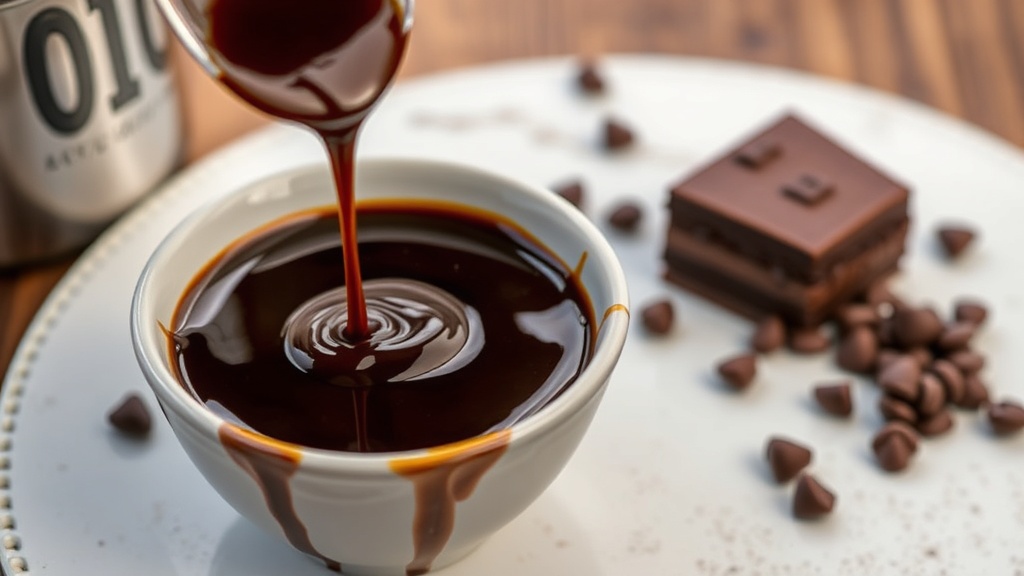
- Emulsify: Let it sit for one minute. Then, start whisking from the center of the bowl in small circles. Slowly increase the speed until the chocolate and coffee have joined into a smooth, shiny liquid.
- Add Vanilla: Stir in half a teaspoon of vanilla extract at the very end.
If the glaze feels too thick, add a teaspoon of coffee at a time. If it's too thin, you'll need to add a bit more chopped chocolate. It's a balancing act, but you'll get there!
Glaze Consistency Comparison
Depending on how much coffee you add, you'll get a different result. Use this table to decide which consistency you're aiming for based on what you're glazing.
| Liquid Amount | Resulting Consistency | Best For... |
|---|---|---|
| Minimal Coffee (Thick) | Heavy, fudgy, and stable | Layer cakes or brownies |
| Medium Coffee (Standard) | Smooth, pourable, and glossy | Bundt cakes or pound cakes |
| More Coffee (Thin) | Light, translucent, and runny | Ice cream or fruit toppings |
What Should I Avoid When Making Chocolate Glaze?
The biggest mistake to avoid is adding water or letting steam enter the bowl. Even a single drop of water can cause the chocolate to "seize," turning your beautiful glaze into a gritty, unusable paste. This is why I always use a dry whisk and a dry bowl.
Another thing to watch out for is the heat. If you use a microwave to melt your chocolate, go in 15-second intervals. If you overheat the chocolate, the proteins and sugars will burn, and you'll lose that smooth texture. It's much safer to use a double boiler method or the saucepan method I mentioned above.
If you're worried about the texture of your chocolate, it's worth noting that the quality of your fats makes a massive difference. For a deep dive into how different fats behave in baking, the FDA's resources on food components can provide some interesting technical context, though you don't need to be a scientist to make a great glaze!
Troubleshooting Common Glaze Issues
Don't panic if things don't go perfectly the first time. Most "fails" in the kitchen are actually just learning opportunities. Here is what to do when things go sideways:
- If the glaze is grainy: You likely overcooked the chocolate or used coffee that was too hot. You can try to fix this by adding a tiny bit more warm coffee and whisking vigorously, but sometimes it's a lost cause.
- If the glaze is too thin: Add more finely chopped chocolate. Let it sit for a minute to absorb the liquid, then stir.
- If the glaze is too thick: Add a teaspoon of warm coffee or hot water (be careful with the water!) and whisk until it reaches the desired flow.
I once spent an entire afternoon trying to perfect a chocolate ganache for a sourdough-based cake—it was a total mess at first. I ended up with something that looked more like chocolate sludge than a glaze. But after adjusting the liquid ratios, it finally clicked. It’s all about the patience.
The beauty of using leftover coffee is that there is zero pressure. If you mess up the ratio, you haven't wasted expensive espresso; you've just used a bit of coffee that was going to be tossed anyway. It's a low-stakes way to practice your decorating skills.
Once you master this, you can use it on almost anything. A simple chocolate sponge cake becomes a decadent dessert with just a few spoonfuls of this glaze. It works beautifully over coffee-flavored sponge cakes too, creating a lovely, cohesive flavor profile.
Try it out on your next baking day. It's a simple way to turn "waste" into something truly wonderful. Just remember to keep your tools dry and your chocolate chopped small, and you'll be fine.
Steps
- 1
Brew a concentrated espresso or strong coffee
- 2
Incorporate the liquid into your melted chocolate or ganache
- 3
Whisk until the texture is smooth and glossy