Strawberry Galette: The 'I Can't Make Pie Crust' Pie

Okay, I need to tell you something that might actually change your baking life: the "rustic" look isn't a consolation prize. It's the whole point.
I spent years being scared of pie crust. Not embarrassed-scared — like, genuinely avoidant. My Popo made these incredible pastry things completely by feel, no recipe, and I'd watch her hands work and think I will never be able to do that. She'd crimp perfectly without a thought. I'd crimp and end up with what looked like a child's art project that got stepped on.
So I stopped making pies. For years.
Then someone introduced me to galettes, and I genuinely felt like I'd been lied to my whole baking life.
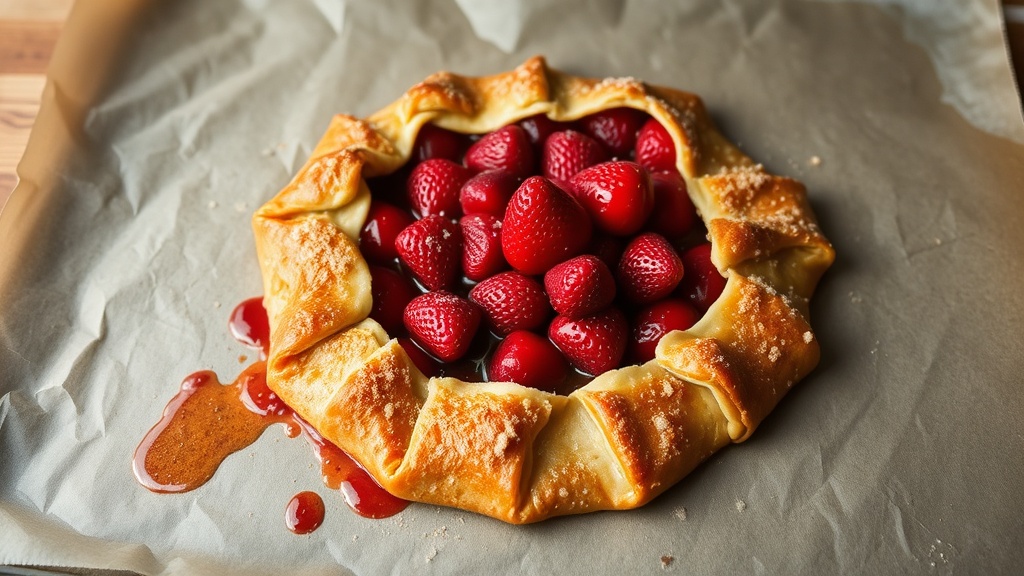
A galette is basically a free-form tart. You make a rough pastry disc, pile filling in the middle, fold the edges up loosely, and bake it. That's it. There's no pie dish. No crimping. No anxiety spiral about whether your edges are even. The whole aesthetic is "I baked this in a French farmhouse and I have better things to do than fuss." It is the baking equivalent of that effortlessly messy hair that takes 45 minutes to achieve, except galettes actually are effortless.
The cracks? Rustic. The uneven edges? Rustic. The filling that bubbles out the side? Rustic.
This is not a cope. This is genuinely the correct framing.
The Pastry (I Promise It's Simple)
Here's what you need for one galette that serves 4–6:
The Dough:
- 1½ cups (180g) all-purpose flour
- ½ tsp salt
- 1 tsp sugar
- ¾ cup (170g) cold butter, cubed
- 4–5 tbsp ice water
The Filling:
- 2 cups fresh strawberries, hulled and halved (about 320g)
- 3 tbsp sugar
- 1 tsp lemon zest
- 1 tbsp cornstarch
- Pinch of salt
Finish:
- 1 egg, beaten (egg wash)
- 1 tbsp turbinado sugar for the edge (optional but makes a huge difference)
The Dough, Step by Step
Cold is your friend here. Cold butter, cold water, cold hands if you can manage it (I run mine under cold water for 30 seconds before I start). The whole goal is to keep those butter pieces intact as long as possible — they're what create layers and flakiness.
1. Mix your dry ingredients — flour, salt, sugar together in a bowl.
2. Add butter and press it in. You can use a pastry cutter, two knives, or just your hands. If using hands: work fast, press the butter chunks flat rather than rubbing them in, and stop when you have pieces ranging from pea-sized to almond-sized. Don't go for sandy texture like some recipes tell you — you want visible butter.
3. Add ice water one tablespoon at a time. Stir with a fork after each addition. Stop when the dough just barely holds together when you squeeze it. It will look shaggy and a little dry — that's correct.
4. Here's the lamination part — and this is where the sourdough people are going to feel smug. Turn the dough onto your work surface and do 2–3 rough folds. Like a letter fold: pat it into a rough rectangle, fold the bottom third up, top third down, turn 90 degrees, repeat. You're creating layers without crying. This is NOT croissant territory — no 6-fold marathon — just a couple passes. This is how Popo's pastry always had that almost-flaky-but-not texture.
5. Wrap and rest in the fridge for at least 30 minutes. Non-negotiable. This relaxes the gluten so your dough rolls out without springing back at you.
Macerate Your Strawberries
While the dough rests, toss your strawberries with the sugar, lemon zest, cornstarch, and salt. Let them sit for 30 minutes at room temperature.
This is osmosis doing its thing — the sugar pulls juice out of the berries. You want this to happen before the galette goes in the oven, not during. If you skip this step, all that juice releases in the oven and you get a soggy bottom situation. The macerated berries also concentrate in flavor, which is why strawberry galettes taste better than most strawberry pies even though they're way less work.
After 30 minutes, drain off about half the accumulated liquid (drink it, it's delicious), then toss the berries with the cornstarch that's sitting at the bottom of the bowl.
Assembly
Preheat your oven to 400°F (205°C). Line a baking sheet with parchment.
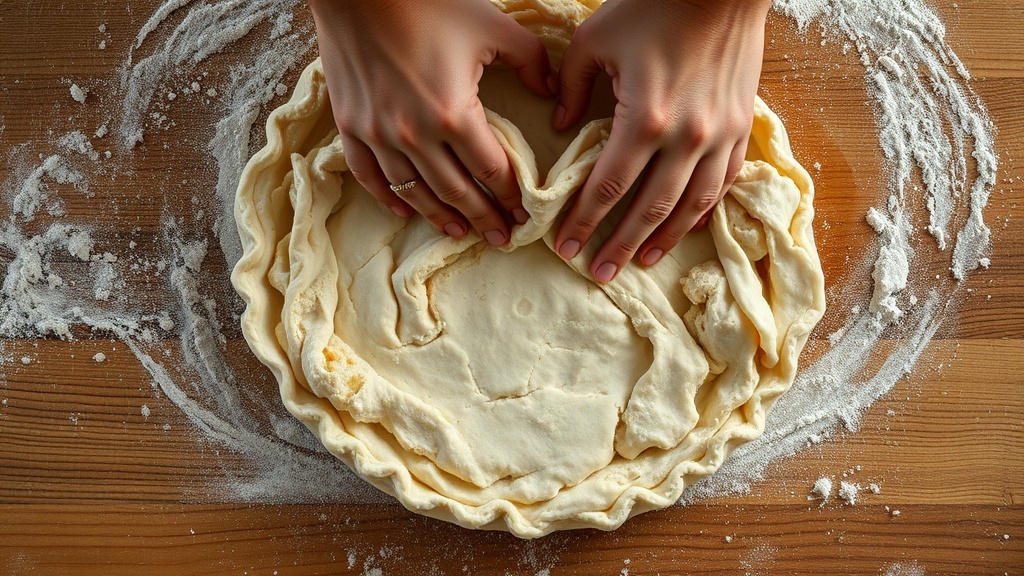
Take your rested dough and roll it out on a lightly floured surface into a rough circle, about 12 inches across. And I mean rough — ovals are fine. Lumpy edges are fine. If it tears, press it back together. This is the whole philosophy right here.
Transfer to your parchment-lined pan. (Easiest method: roll the dough loosely around your rolling pin, then unroll it onto the pan.)
Leave a 2-inch border empty and arrange your strawberries in the center. I like overlapping circles because it looks pretty and takes 90 seconds. Doesn't matter.
Dock the center. Use a fork to poke a few holes in the pastry under the filling. This vents steam and is your soggy-bottom insurance policy without blind baking. Don't skip it.
Fold the edges up over the filling, overlapping as you go. Press the folds gently so they stick to each other. They don't need to be even.
Brush the edges with egg wash. Sprinkle turbinado sugar over the pastry edges if you have it — it adds crunch and makes it look very intentional.
The Bake
400°F for 25–30 minutes, until the edges are deep golden brown.
The edges will brown faster than the center — that's correct and expected. The filling should be bubbling and some of it may escape. Let it. That caramelized strawberry puddle on the parchment is not a failure; it's a feature. It gets chewy and slightly jammy and if you're home alone you can eat it right off the paper.
Your galette is done when the pastry is visibly golden and the bottom (lift a corner with a spatula) is golden too, not pale.
Let it cool for at least 15 minutes before cutting. The filling needs time to set slightly or it'll run everywhere. (15 more minutes of this means you can transfer it to a plate without tragedy.)
Troubleshooting / Real Talk
"My edges unfolded during baking." That's fine, it still tastes the same. Next time chill the assembled galette for 15 minutes before baking — it helps the folds hold.
"The filling is really runny." Did you drain the macerating liquid? That's usually it. Also make sure the cornstarch got coated on the berries evenly.
"My pastry is tough." You worked the dough too long or used warm butter. Less handling next time, colder ingredients. Still edible, just denser.
"It's not as pretty as the pictures." It's a galette. The pictures are lies. Yours looks rustic and handmade and that's literally what people pay upwards of $10 for at farmers' market bakeries (in my experience, anyway).
Storage
Room temp, covered lightly, for up to two days. To reheat: 350°F for 8–10 minutes. Do not microwave — the pastry gets sad. It's also excellent cold with yogurt for breakfast, which I'm going to pretend is a normal thing to say.
Why Now (And Also, Later)
Honest confession: actual BC strawberry season runs June through August, not March. If you're reading this in early spring, your farmers' market strawberries are probably from California or a hothouse — still good, still worth using. And this recipe works perfectly well with those.
But I'm also writing this now so that when June rolls around and the local berries actually show up, you have the technique already in your hands. Because that is when I genuinely believe a galette is the best thing you can make with strawberries. Peak-season local berries are already sweet enough that you don't need to do much. You're not hiding them in custard or making them fight through a thick pie filling. They're just... there. Front and center. Slightly caramelized and jammy from the heat.
Whenever you make this: find the smallest, reddest, most irregular-looking berries (they're always sweeter than the perfect ones). Make this. It will take you about an hour of active time, most of which is waiting for things to chill or bake.
You've got this. And your Popo (or whoever taught you to be comfortable in the kitchen) would be proud — because the whole point was never perfection. It was making something good with your hands.
Go make the galette.
Have questions or galette disasters to report? Drop them in the comments — I read every single one.