My Sourdough Starter Winter Rescue Routine (For a Starter That Went Sleepy)

My Sourdough Starter Winter Rescue Routine (For a Starter That Went Sleepy)
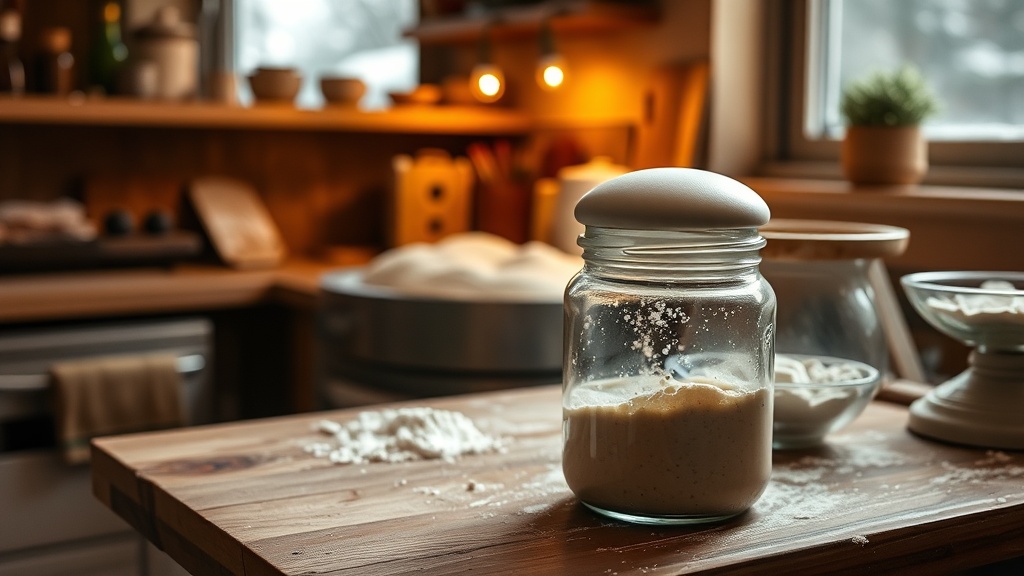
It happens to me every year in Vancouver: the starter looks alive in autumn, then in January it starts acting like it has a personality disorder. One day it’s bubbly and chatty. Next day? Flat. Smelly. Quiet in a way that feels personal.
If that sounds familiar, here is the exact routine I use when my starter needs a reboot. It is not magic. It is temperature control, feed math, and a little patience.
Why Your Starter Fades in Winter
Winter affects every variable in fermentation, and yeast feel it first.
- Cool air slows yeast metabolism.
- Cold jars take longer to warm up after feedings.
- Starter can exhaust itself on too little food for too long.
In practical terms, your starter is usually not “broken.” It is under-fueled for the temperature.
Step 1: Don’t Fight Your Starter’s Environment — Fix It
Before changing flour ratios, I change where the jar lives.
My target feeding zone: 20–26°C (68–79°F) is a sweet spot for a stable restart routine in cold weather.
Easy warming options that actually work:
- On top of the fridge (the least fussy option, but monitor because some fridges are cold-hot-cold).
- Near a pilot light (not touching it, just nearby).
- Oven with light on during proofing only; never inside a hot oven.
- Proofing box with warm water jars and a wrapped container, if you want precision.
Cold air in Vancouver is not your enemy. Inconsistent warm spots are your enemy.
Step 2: Change the Feed Ratio to Match the Weather
In warm weather, I can often keep a starter on a lighter routine. In winter, I give it both more total food and less stress between feeds.
If your jar is sleepy, use this restart ratio for 2 to 3 cycles:
1:3:3 (starter : flour : water, by weight)
So if you start with 20g starter, add 60g flour and 60g water.
Why this ratio? It gives the microbes a clearer recovery window. They get enough food to build structure, and the longer fermentation window prevents the “feed but still hungry” pattern.
Step 3: Trim the Ferment Length, Not the Ambition
This is the part people get wrong when they panic:
Don’t keep waiting for a dramatic double overnight. In winter, 4 to 6 hours may be realistic for one feeding cycle, not 2 to 3.
So what I do:
- Let it sit until it smells active, not until it doubles like a show-off.
- Feed on a schedule even if it looks “slow,” as long as it rises some and no bad odor is developing.
- Stabilize with one “short” proof feed first (1:3:3 every 12–16 hours), then move back into normal cadence.
Once it’s climbing, I return to my normal maintenance rhythm.
My Exact Rescue Flow (The One I Actually Use)
If my starter is sluggish, I follow this for 2 days:
Round 1: Reset Feed
- Discard 80–90% of the old starter and keep 20g.
- Feed 20g starter with 60g flour and 60g room-temp water.
- Rest in your warmest reliable spot for 12 hours.
Round 2: Confirm Recovery
- Use all of the round-1 starter.
- Feed again at 1:3:3.
- Check volume increase, bubble structure, and aroma within 10–16 hours.
Round 3: Prepare to Bake
- Feed once more at 1:2:2 before building levain for baking.
- Use half of the jar at peak and keep the rest refrigerated as a backup.
What to Look For (Not Just “Looks Active”)
During winter recovery, these are better indicators than Instagram-level doubling:
- Surface activity: consistent rising and collapsing over time.
- Bubble density: tiny bubbles throughout the dough, not only at the top.
- Aroma: yeasty and mild, not solventy or harsh.
- Texture: tacky and elastic, not stringy or dry.
If it smells like nail polish remover, throw it away and start over. I am not gentle there.
The Storage Rule (This Is the Part Most People Skip)
Once you recover, don’t keep a winter starter underfed in the back of the fridge for a week and expect reliability.
My rule is this:
- If I won’t bake in 3 days, I refrigerate after a light feed.
- If I will bake in 1–2 days, I keep it at room temp with a light feeding rhythm.
Simple. Fewer surprises. Fewer “why did this not rise?” mornings.
Honest Quick Tips That Save Time
- Use a scale. Flour by volume and winter humidity are not your friend.
- Feed with water around 75°F. Too cold water in a cold room delays everything.
- Keep a backup jar. Not optional. Mine is tiny and ugly; it saves batches.
- Label feed dates. A sticky note on the jar prevents guessing.
That’s how I stop losing a week to a starter tantrum.
The Big Takeaway
When winter slows your starter, you’re not failing at sourdough. You’re just giving it conditions it can’t keep up with.
My three-step rescue plan is boring on purpose:
- Stabilize temperature.
- Use a stronger feed ratio (1:3:3).
- Give a short, controlled recovery timeline.
Do that three times and most starters come back with a profile you can trust.
If you want the version where this is tied to bake-day timing, I keep the same framework but switch to a tighter build just before mixing dough.