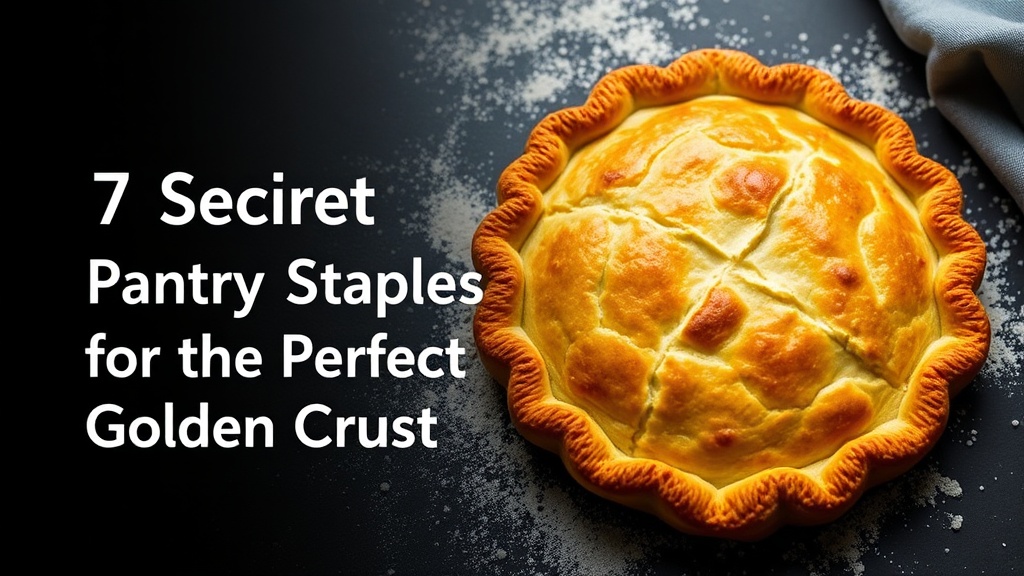
7 Secret Pantry Staples for the Perfect Golden Crust

The Magic of Honey and Sugar
Egg Wash Brilliance
The Power of Full-Fat Milk
Cornstarch for Crispiness
Malt Powder for Deep Color
Yogurt for Texture and Shine
Maple Syrup for Richness
You will learn the specific ingredients and pantry items that transform a pale, soft loaf into a bakery-quality bread with a deep golden, crunchy crust. This guide covers the science of crust development, from moisture control to sugar caramelization, using accessible tools and ingredients found in any standard kitchen.
The Science of the Perfect Crust
A perfect crust is the result of two primary chemical processes: caramelization and the Maillard reaction. While caramelization involves the oxidation of sugars, the Maillard reaction is the interaction between amino acids and reducing sugars that creates that savory, complex aroma and deep brown color. To achieve a professional finish, you must manipulate heat, moisture, and pH levels through strategic pantry additions.
Many home bakers struggle with "tough" crusts that feel leathery rather than crispy. This often happens because the crust sets too quickly before the bread has fully expanded in the oven. By using the following seven staples, you can control the timing of crust formation to ensure your loaf achieves maximum volume and a shatteringly crisp exterior.
1. High-Quality Honey or Agave Nectar
While white granulated sugar is a standard ingredient, liquid sweeteners like honey or agave nectar offer a distinct advantage for crust development. These substances are hygroscopic, meaning they attract and hold moisture, but they also undergo caramelization at much lower temperatures than sucrose. Adding just one tablespoon of honey to a standard sourdough or yeast dough provides the necessary sugars to trigger a rich, golden-brown hue without requiring an excessively high oven temperature.
When using honey, remember that it introduces moisture into the dough. If you are making a high-hydration dough, such as a Ciabatta, you may need to slightly reduce your water content by a teaspoon to maintain the structural integrity of the crumb. For a foolproof result, use a local wildflower honey, which often contains trace minerals that can subtly enhance the flavor profile of the crust.
2. Malt Powder (Barley or Rye)
If you have ever wondered how professional bakeries achieve that deep, mahogany color on their crusts, the answer is often diastatic malt powder. Malt powder contains enzymes that break down starches into simple sugars. These sugars are then readily available for the Maiod reaction during the baking process. Unlike adding raw sugar, which can sometimes lead to a tacky or sticky crust, malt powder provides a more controlled, even browning.
For home bakers, I recommend looking for Barley Malt Powder at specialized baking retailers or high-end grocery stores like Whole Foods. Incorporating 1% to 2% of the total flour weight in malt powder will significantly improve the crust's color and the bread's overall aroma. This is particularly effective when baking hearty, dark breads where a robust exterior is desired to balance a soft, airy interior.
The Importance of Enzyme Activity
It is vital to distinguish between diastatic and non-diastatic malt powder. Diastatic malt contains active enzymes that will actually ferment and break down your dough during the proofing stage. If you use too much, you risk over-proofing or a gummy texture. Non-diastatic malt is essentially just toasted malt and is safer for beginners who want the color without the risk of altering the dough's fermentation rate.
3. Unflavored Gelatin or Agar Agar
It may seem unconventional for a bread recipe, but a tiny amount of gelatin or agar agar can act as a powerful crust enhancer. These substances help stabilize the structure of the dough and manage moisture evaporation. In high-heat environments, like a Dutch oven, these additives help create a thin, glass-like crust that stays crisp even after the bread has cooled.
To use this technique, dissolve a half-teaspoon of gelatin in your warm water before mixing it into the flour. This creates a more cohesive protein network. If you prefer a plant-based approach, agar agar works similarly, though it is more sensitive to temperature. This technique is excellent for those attempting to bake crusty artisan loaves without a professional steam injection oven.
4. High-Quality Sea Salt
Salt is often viewed solely as a flavor enhancer, but it plays a critical role in crust texture. Salt regulates yeast activity, which indirectly affects how much the bread expands (the "oven spring"). A controlled rise leads to a thinner, more delicate crust. Furthermore, using a salt with a higher mineral content, such as Maldon Sea Salt or Himalayan Pink Salt, can influence the crust's final texture through its unique mineral profile.
For a more dramatic visual and textural effect, try the "salt crust" method. Instead of mixing all the salt into the dough, sprinkle a few flakes of coarse sea salt on the surface of the loaf just before it enters the oven. The salt draws out moisture from the surface of the dough through osmosis, creating tiny pockets of intense crunch and a beautiful, crystalline finish.
5. Cornstarch or Rice Flour
To achieve that coveted "shatter" when you bite into a baguette or a sourdough boule, you need to manage the starch on the surface of the dough. Professional bakers often use a dusting of flour, but a more effective method is using cornstarch or fine rice flour. These starches have a much lower protein content than wheat flour, which means they do not develop gluten. This prevents the crust from becoming "bread-y" or chewy and instead makes it incredibly crisp.
Before baking, lightly dust your baking stone or your proofing basket (banneton) with a mixture of 50% bread flour and 50% rice flour. The rice flour provides a smooth, non-stick surface and a beautiful, matte finish to the crust, while the cornstarch helps absorb excess moisture during the initial stages of baking, ensuring the crust sets firmly.
6. Apple Cider Vinegar
Acidity is a secret weapon for crust color. Adding a teaspoon of apple cider vinegar to your liquid ingredients lowers the pH of the dough. A slightly more acidic environment accelerates the Maillard reaction, leading to a faster and deeper browning. This is especially helpful if you are baking at a lower temperature to ensure the center of a large loaf is cooked through without burning the exterior.
The vinegar also helps to strengthen the gluten network. The acid interacts with the proteins in the flour, making them more resilient during the expansion phase. This results in a crust that is sturdy and crisp rather than soft and pale. The subtle fruity notes of the vinegar are completely lost during the baking process, leaving behind only the structural and color benefits.
7. Ice or Cold Water (The Thermal Shock Method)
While not a "dry" pantry staple, the temperature of your water is perhaps the most influential factor in crust development. Using ice-cold water when mixing your dough can actually lead to a better crust. This is because it slows down the initial fermentation, allowing for more complex flavor development. When this cold dough hits a hot, preheated Dutch oven or baking stone, the "thermal shock" causes a rapid expansion of steam.
To maximize this effect, ensure your oven and your baking vessel (like a Le Creuset cast iron pot) are preheated for at least 45 minutes at 450°F (232°C). The sudden transition from the cold dough to the extreme heat creates a burst of steam that pushes the crust outward, creating the large, airy bubbles known as "blisters" that are the hallmark of a professional sourdough loaf.
"The secret to a great crust isn't just about what you put in the dough, but how you manage the environment around it. Moisture, heat, and chemistry must work in perfect unison."
Troubleshooting Common Crust Issues
Even with the best pantry staples, you may encounter a few common hurdles. Here is how to address them:
- Crust is too thick and hard: This usually means you didn't provide enough steam during the first 15 minutes of baking. Ensure your Dutch oven lid is tight-fitting or use a tray of boiling water in the bottom of the oven to create a steam chamber.
- Crust is pale despite high heat: You likely lack enough reducing sugars. Increase your honey or malt powder slightly, or ensure your oven temperature is actually reaching the target on an independent thermometer.
- Crust is dull and lacks shine: This can be caused by a lack of surface moisture. Try brushing the loaf with a very light coating of olive oil or a diluted honey water solution just before it goes into the oven.
Baking is a science, but it is also a craft that rewards experimentation. By keeping these seven staples on hand, you are no longer just following a recipe; you are controlling the variables that create a professional-grade crust. Whether you are making a simple sandwich loaf or a complex sourdough, these small adjustments will make all the difference in your baking journey.