The Chocolate Lava Cake That Makes Every Dinner Feel Special

There's something magical about the way a chocolate lava cake can transform an ordinary evening into a celebration. I still remember the first time I made these little gems—it was my anniversary, and I wanted something that felt restaurant-fancy without requiring culinary school credentials. When I pulled them from the oven, my hands shook a little as I plated them, but that first spoonful revealed that perfect flow of warm chocolate, and my husband's eyes lit up like a kid on Christmas morning. That's when I knew this recipe would become my signature move for every special occasion (and quite a few "just because" Tuesdays).
What makes these cakes so special isn't complicated technique—it's quality ingredients working together in perfect harmony. You'll need good dark chocolate (at least 60-70% cacao), because this is the star of the show; cheap chocolate won't give you that silky, rich center. Real unsalted butter brings gloss and depth, while room-temperature eggs create the structure that holds your cake together while keeping the center luxuriously molten. Don't skip the pinch of salt—it amplifies the chocolate flavor beautifully. I also add a splash of vanilla extract because it rounds out the bitterness of the dark chocolate.
Let's Bake Together
Start by preheating your oven to 425°F and generously buttering four 6-ounce ramekins. Dust them with cocoa powder instead of flour—this prevents that white, floury look on your finished cakes and adds extra chocolate flavor.
Next, melt 6 ounces of dark chocolate with half a cup of butter. I use a double boiler, but the microwave works in 30-second bursts if you stir between each interval. Let this cool slightly while you whisk together two whole eggs, two egg yolks, and a quarter cup of sugar. You want the mixture pale and thick, about two minutes of vigorous whisking.
Now, gently fold your chocolate into the eggs. The key word here is gentle—we're not making whipped cream! Add a tablespoon of flour and that pinch of salt, folding just until combined. The batter should look shiny and pour like heavy cream.
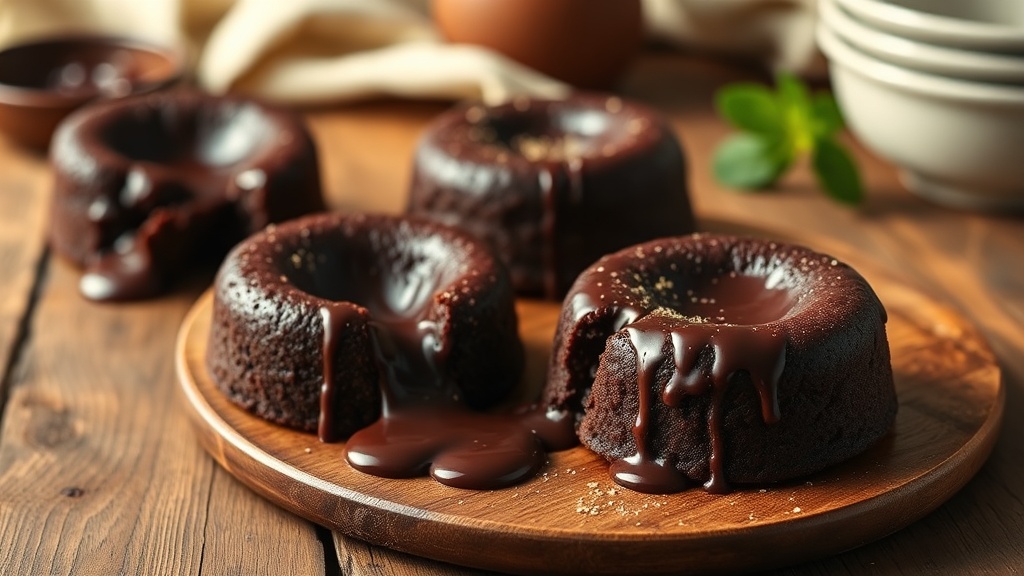
Divide the batter among your prepared ramekins. Here's where trust comes in: bake for exactly 12 to 14 minutes. The edges should look firm, but the centers will still jiggle slightly when you tap the ramekin. That's your lava waiting to happen!
Common Pitfalls to Avoid
The biggest mistake I see is overbaking. I know it's scary to pull them out when the center still looks wet, but trust the process! If you wait until the center looks done, you've lost your lava. Conversely, underbaking by too much gives you chocolate soup instead of cake.
Another error is skipping the prep work. These cakes love to stick, so don't be shy with the butter and cocoa. Also, avoid using chocolate chips—they contain stabilizers that prevent proper melting. Stick to baking bars or couverture chocolate.
Make It Your Own
Once you've mastered the classic, play around! I love adding a teaspoon of espresso powder to enhance the chocolate flavor, or stirring in a tablespoon of orange zest for brightness. For a peanut butter twist, drop a small spoonful of peanut butter into the center of each ramekin before baking.
Serve these warm with a scoop of vanilla bean ice cream—the contrast of hot and cold is heavenly—or a dollop of freshly whipped cream and a handful of raspberries.
Remember, baking is about joy, not perfection. Even if your first attempt doesn't have the perfect flow, it'll still taste like chocolate heaven. So preheat that oven, and prepare to wow yourself. You've got this!